|
The clouds rolled in quickly this afternoon, but it didn't stop us from flying below the cloud shelf. I'll admit, judging the distance from the clouds is a little hard, and you need to know with a VFR because the FAA mandates that you be 500 feet below or above the clouds. I pulled the piper cherokee 140 out of the hangar and my instructor asked me to pre-flight the aircraft by myself. I went around step by step, and forgot only one thing! Thats pretty good considering I was doing it from memory and didn't have a checklist on hand. After the pre-flight we started up the aircraft and took to the air (all which I recorded below). The cherokee's annual maintenance was due tomorrow, without it the aircraft would be illegal to fly. The club's mechanic works out of the Tiffin airport, so my flight lesson insinuated doing some basic procedures such as 360 degree turns, sharp bank turns, running through emergency landing caused by engine shut off, taking off, traffic pattern work, slow flight, and more. Most of the work I did with my instructor, he was as hands off as possible and I can say that learning through experience has greatly benefited my knowledge. With each lesson I am building more and more confidence in my own ability to control the aircraft. After we dropped the plane off at Tiffin, the treasurer of the club met us at the airport with the club's piper arrow II, so we didn't have to drive back. The arrow is a more complex plane than the cherokee 140, due to 60 more horsepower, direct injection, retractable landing gear, and the ability to feather the prop. On our initial flight lesson, yesterday, my instructor hesitated to say wed fly the arrow while the piper was down, but at Tiffin, he was excited to get me behind the yoke. He was even talking to the person that does check up flights (a bi-annual flight to make sure you know what you're doing) about how I fly very well for how new I am to the profession. Now he was going to let me fly the arrow, I can't lie, I was a bit excited and nervous at the same time. So nervous that I thought I hit record on my camera, but only took a photo... But my instructor still remain hands off for the flight back, despite the aircraft being noticeably faster than the cherokee. He let me do the entire take off, taxiing, directional turns toward Bowling Green, and a couple of maneuvers we did earlier like the 360 degree turn.
1 Comment
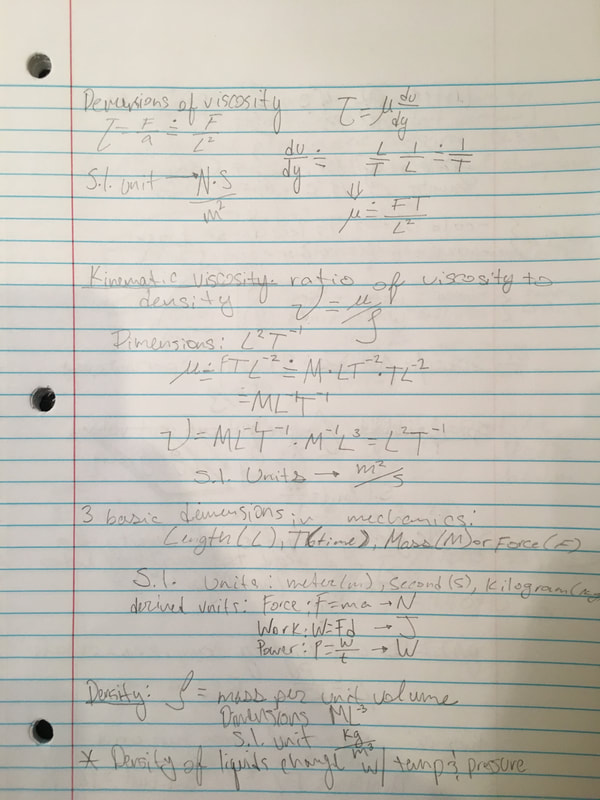
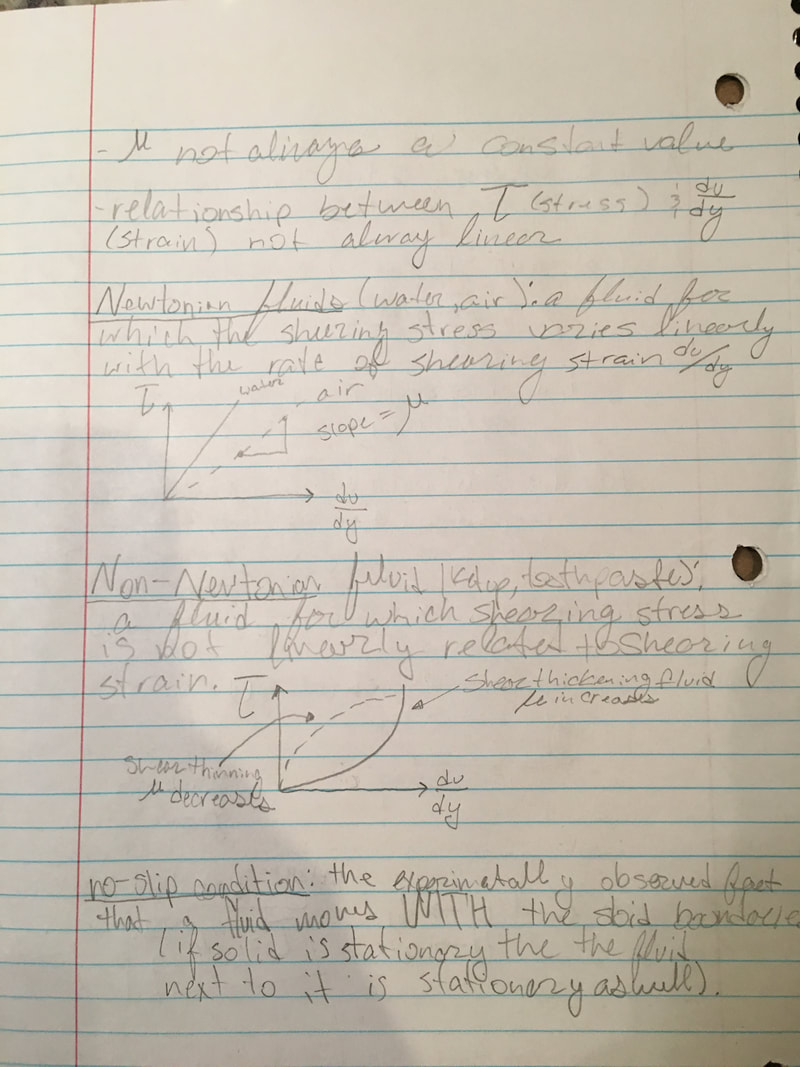
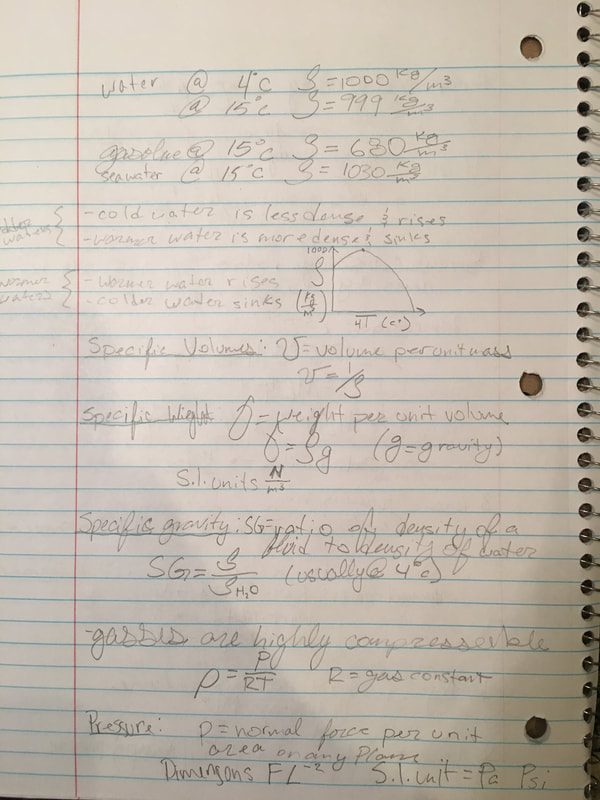
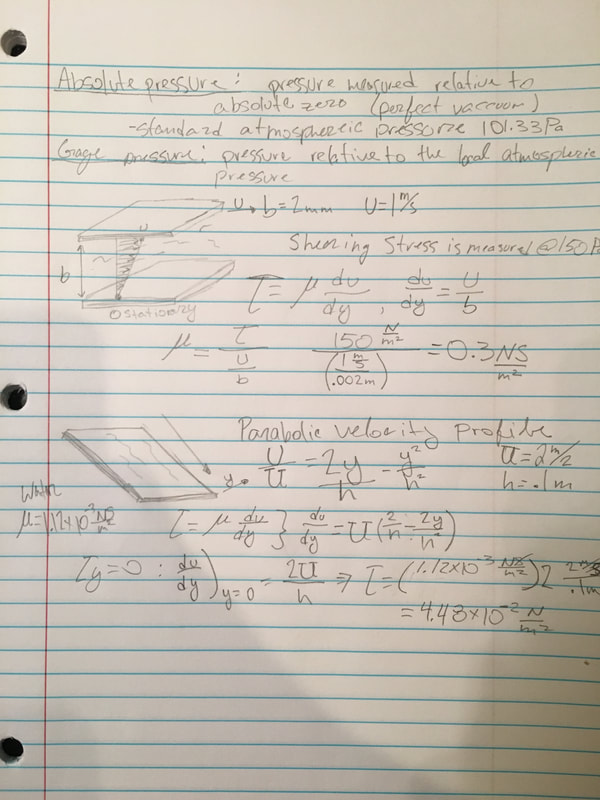
Today is the first day I get to spend at the Wood County Regional Airport. The fog this morning is very heavy. Which is really unfortunate because I am working towards a VFR license (Visual Flight Rules), which is one that relies not on the interments in the cabin, but solely the visuals around and outside the aircraft. As you can imagine, fog makes it very difficult to see outside the aircraft, so my lesson was delayed for an hour or so. In the meantime I decide to run over the pattern work one more time before I ventured out in the actual plane.  Finally the fog cleared and I was able to meet up with my flight instructor at the Wood County Regional Airport. We would be doing our lesson in a piper cherokee 140 (pictured below). We started by going over preflight check lists and examining the aircraft before flight. Then we started the aircraft and taxied out to the proper runway. My flight instructor whole heartedly believes the best way to learn is hands on and experience so I had to do some of the radio communications and had the do the taxiing. Then came takeoff, while he manned the throttle, I had to keep the aircraft centered on the runway and lift up on the yoke once we reached 65 knots. After we started our climb, I had to navigate to an open space without clouds (VFR pilots aren't allowed to fly through clouds) so that we could rise above them. Then we did some turns and went certain headings so I could get a feel for the aircraft. The we went over a slow flight procedure, where you fly the aircraft as slowly as possible, which for the piper cherokee 140 is about 50 knots. After a short while, we headed back to 1G0 (the designation code for the Wood County Regional Airport), where he landed the plane and I taxied back. 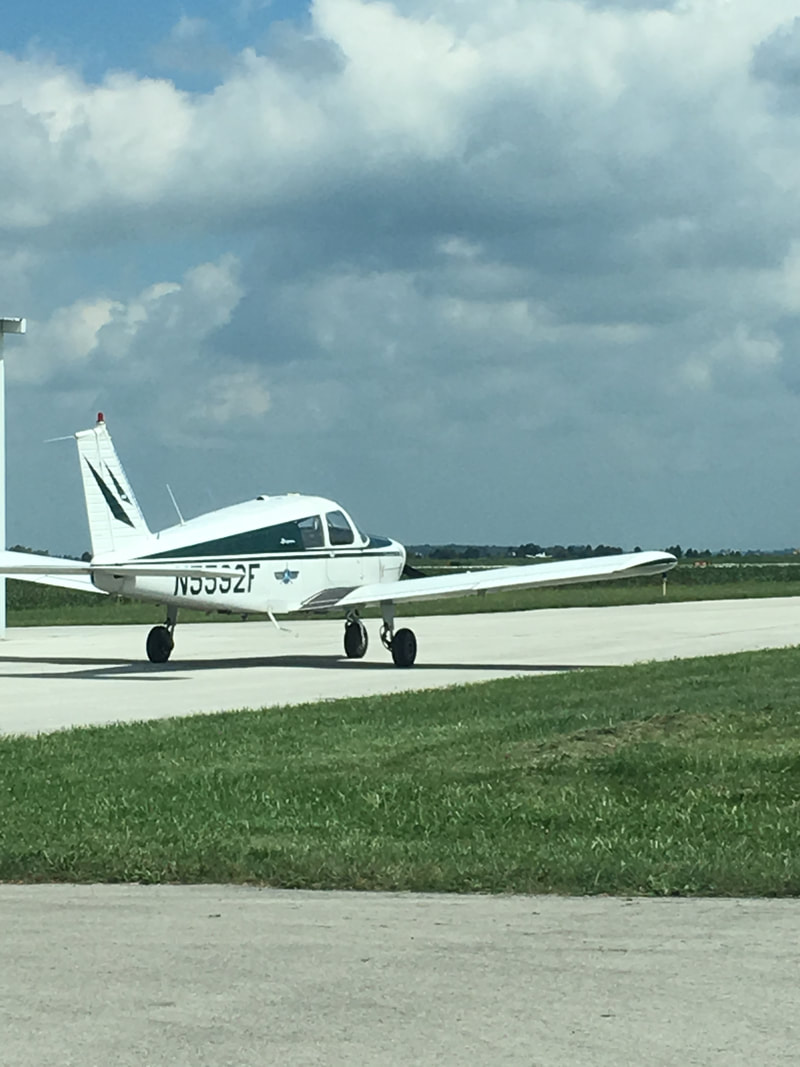 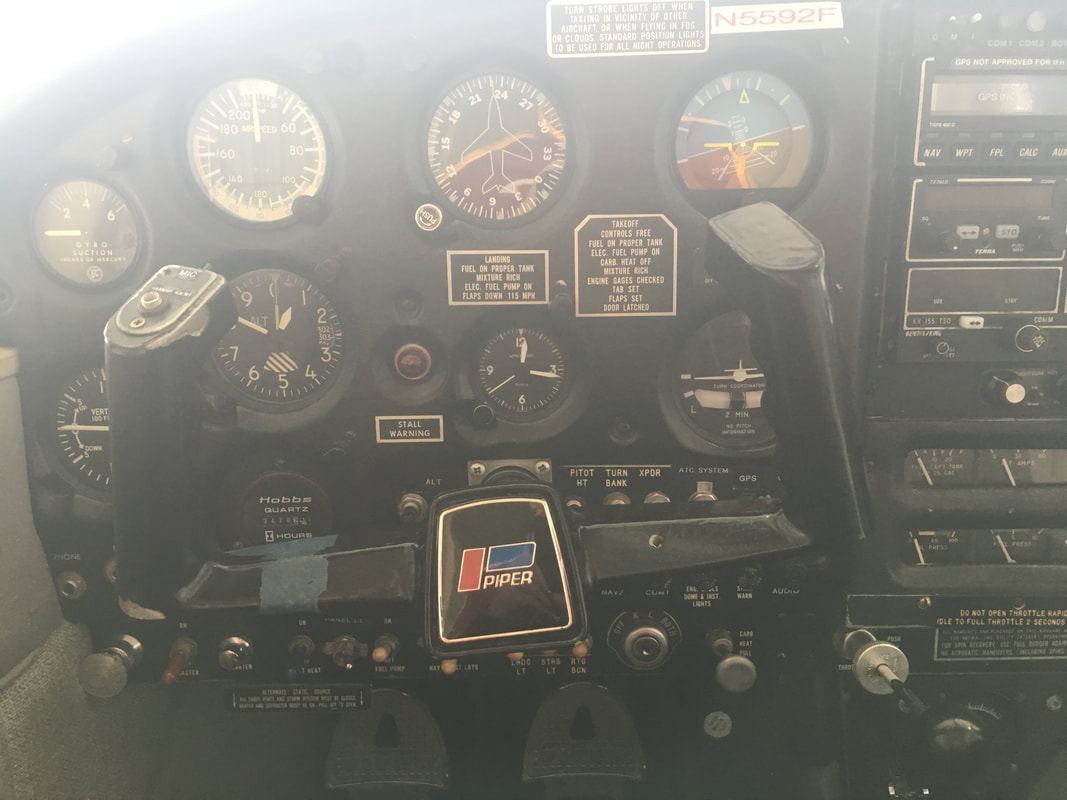 I woke up excited today, ready to assemble the final piece of my simulator! I unboxed the yoke (which came with a second throttle attachment) and set in the screws to hold it to the table. Then all I had to do was plug it into the computer, and... a calibration screen popped up. Now Calibration for the rudder pedals and throttle controls was easy because there were that many buttons to program, but the yoke had six multidirectional buttons in addition to the rotating axis that you had to program. Needless to say, despite its time consuming values and horrifically long process I still had just as much motivation to dive into the simulator. Then came the next issue, the throttle control I was using had a USB plug-in, whereas the throttle control that came with the yoke had a special circular plug-in, and apparently the yoke reads the special plug-in throttle, but not the USB throttle plug-in. So, after a quick swap of throttle controls, I managed to get it working! (With the extra throttle control, I am going to see if I can program them to control a second throttle so I can fly a twin propeller aircraft). Anyway, I started my first flight with the controls. Now since I needed to get a feel of how the simulated aircraft reacts to the movements of the yoke, I started the aircraft on the ground, got it airborne, and tried some basic flight maneuvers such as sharp turns and leveling off at specific altitudes. Once I finally felt somewhat comfortable behind the yoke, I reset the flight and wanted to try the flight pattern (a pattern used at every airport to keep planes from crashing, kinda like a traffic circle in the sky). Below you can see my not so perfect attempt to go through the traffic pattern in the pictures below: After lunch, I headed into school again to take more notes on my fluid mechanics course. I got through two more hour long lectures giving more formulas and definitions for term common used in the field. I even attempted two of the problems walked through in the lecture, and almost got them right, but learned from my errors and saw where I needed improvement (Below are the notes I took on these lectures: This morning and most of the afternoon, my mother and I drove out to the Wood County Regional Airport to meet with a club officer from Eagle Air Flying Club and learn the details. A trip to scout the organization we were leaning towards getting lessons from. The club has many members and two very well kept pipers in individual hangars that we got to tour. Another perk to joining the club, is the networking I can do with the other members at the monthly meeting times. In addition, the Eagle Air Flying Club's rates were at prices you cannot beat. If you're planning on flying at least three times a month, it would be about twenty to thirty dollars cheaper than the other flight instructors in the area. Both my mother and I agreed that the club was the right choice and signed up then and there, after our meeting with the club official I was instantly put into contact with a flight instructor to schedule a flight time. I had to head home right after in order to prepare for a golf match, so the day was cut short. However, I did notice a package on my doorstep when I arrived home, and it was the yoke I ordered a few days ago, it had finally came. Unfortunately I didn't have enough time to open it before I had to leave for my golf match, so it's a task for tomorrow! 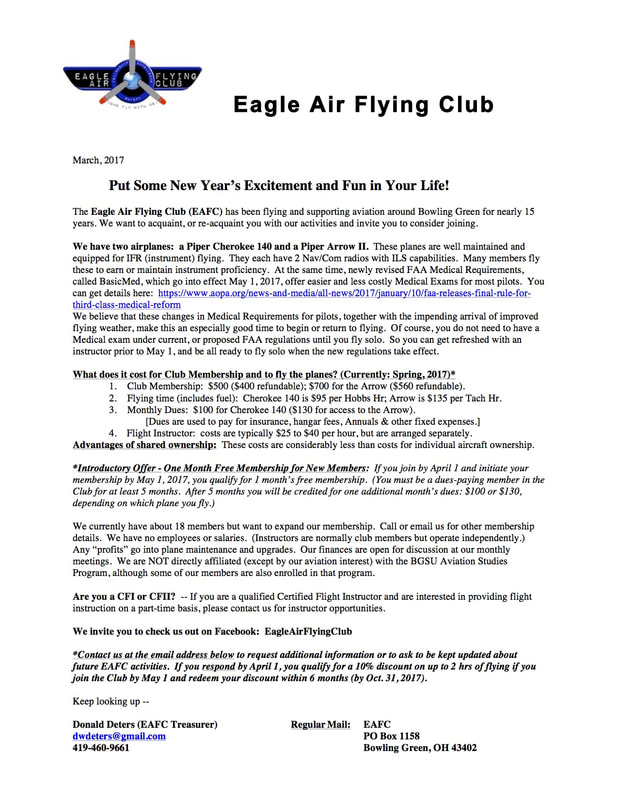 All morning I spent contacting various flight instructors about their rates, lesson overviews, and availability. As much as I would like to place names on my blog to compare and contrast these criteria, I did not ask their permission to and do not wish to undermine or misrepresent them or their business in any manner. I was, however, able to get a hold of three different flight instructors in the area, and talk with them for quite a bit. Ultimately I decided a flying club, called Eagle Air Flying Club, out of the Wood County Regional Airport had the best available program. They readily had two to three flight instructors and two aircraft: a piper cherokee 140 and a piper arrow. So I set up a date on Monday, August 28th to discuss further implications. Then I made my way up to school to take notes on the fluid mechanics lecture from Boston University. I was able to get through the first hour long lecture that was mostly an introduction with a definition of a fluid, and a simplified derivation of a formula to calculate shearing stress. 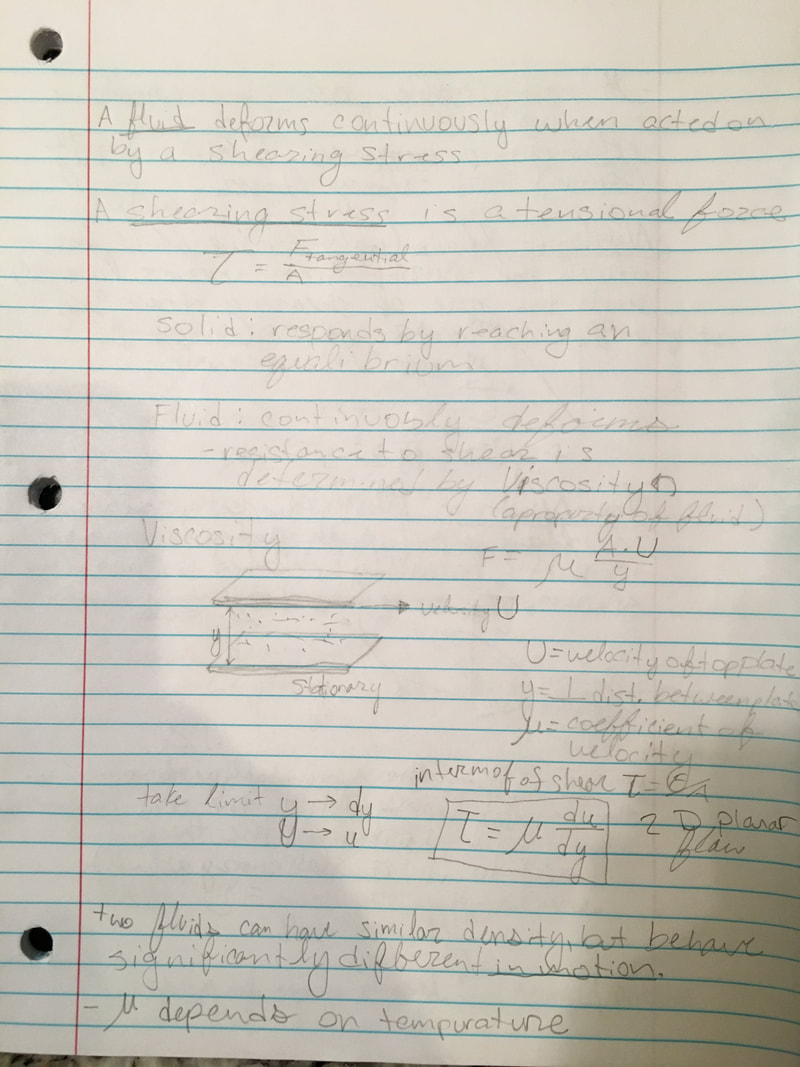 This morning I spent time searching for valuable resources to research properties of aviation. My intent was to find a challenging course that I could grapple with. Since down the road I wish to study aerospace engineering, I figured there might be some solid courses I can reap the benefits from. I came across and app on the App Store called iTunes U, U for university as most of the lectures are recordings from Universities. Liberty University offers two different courses on iTunes U, pertaining to aviation: Turbine Engine and Jet Transports, that deals with engine theory and operations; and Airplane Aerodynamics, which exhibits different applications of physical principals that commercial pilots and fixed-wing pilots encounter. The first topic was too complex to comprehend in the first ten to fifteen minutes of the lecture, and the second wasn't an engineering, like I was looking for. So I kept looking. University of North Dakota (a college with a well known aviation program) has a video lecture on iTunes U, but it was a simple ground school detailing an introduction to flight. Then I found a course, not specifically working with flight, but it was an engineering course that I could understand and was still relevant to the intensive. The lecture is from Boston University and is on fluid mechanics, the first twenty minutes or so provide a well detailed explanation of the course, and it seemed like it would challenge my knowledge of physics. All the meanwhile, I began to move, piece by piece, my simulator to the large screened theater room in my basement; this is where I set up a table, cleared the floor, and placed a chair to prepare the space for the simulator pictured below (minus the yoke, I was still waiting for it to be delivered at the time): -talked with advisors about sponsor issues -planned air force museum trip 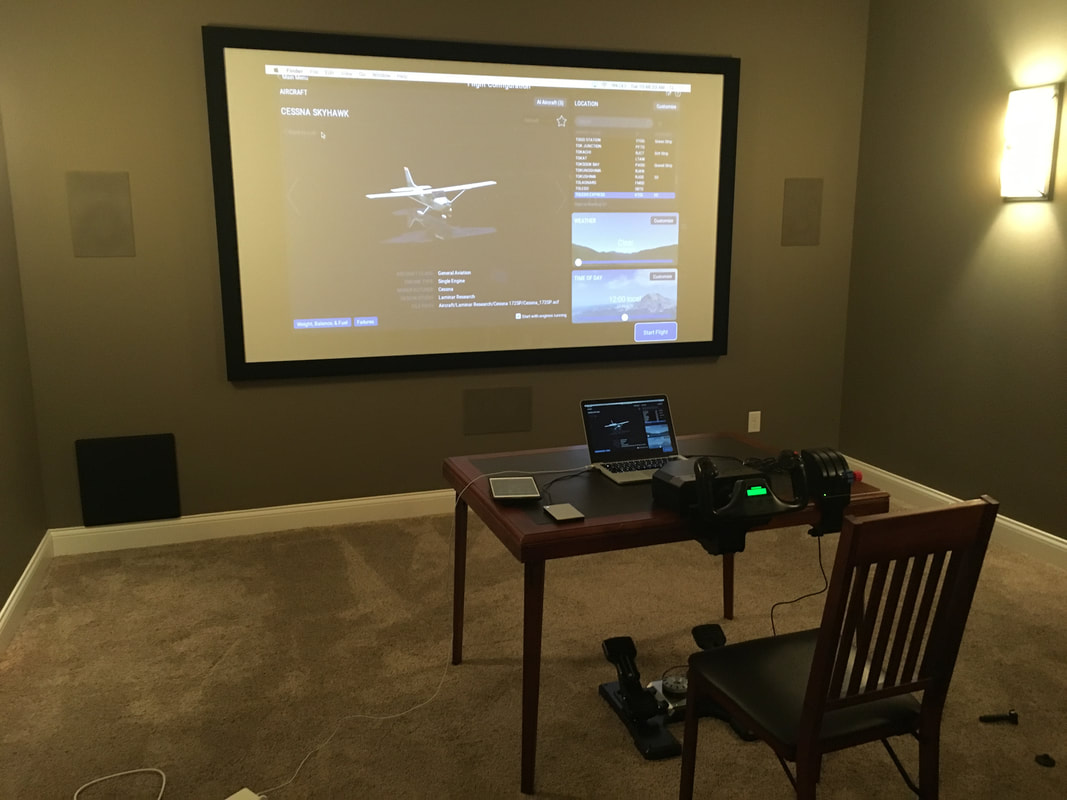 After I finished, I made a trip to school to discuss issues with my sponsor for the intensive and update them on my progress, plus I had hoped to receive advice on where to advance from my current standing. Withal, I devised a plan, and it started with planning a trip to the air force museum near Dayton, Ohio. So I called and found that they have simulators for certain aircraft at the museum and one specifically is only open on the weekend due to it being new. They're at a lull in their season as summer is drawing to a close, so they shouldn't be too busy. Next I talked to my mom and we are headed down there on Friday September 1st.
Today started slow and dredged on. I began to set up my flight simulator (X-plane 11) that I have at home on an external hard drive, and discovered it required a software update. The update had around eighty-two thousand files to check (that's not an exaggeration either) and took about an hour to finish. In the meanwhile, I began to open the extremities to the simulator such as the rudder pedals and throttle controls. I noticed that I was short the yoke; the yoke is essential to controlling the ailerons that turn the airborne aircraft. The flight simulator's keyboard controls for the yoke are moving the track pad up, down, left, and right; however, the sensitivity was very high and difficult to control, and not accurate to an actual aircraft. This led me to see if I could run to the local BestBuy and obtain a training yoke. After a quick stop at school to check in, I could not find a yoke to use for my simulator at the store, however they could order one and I could have it by the beginning of September. So I returned home without ordering it, as September would be a little late, and went on to Amazon. On Amazon, I was able to purchase the proper yoke with free two day shipping and it is scheduled to arrive on Friday night. Until then using the track pad will suffice, as I attempt to learn the ropes of the flight simulator. Upon logging in you're greeted with a screen of options, one of which is a tutorial that teaches you the basics of the simulator. It ran through yoke controls, throttle controls, how to maneuver the camera, and included thing like how to take off (reference picture blow). 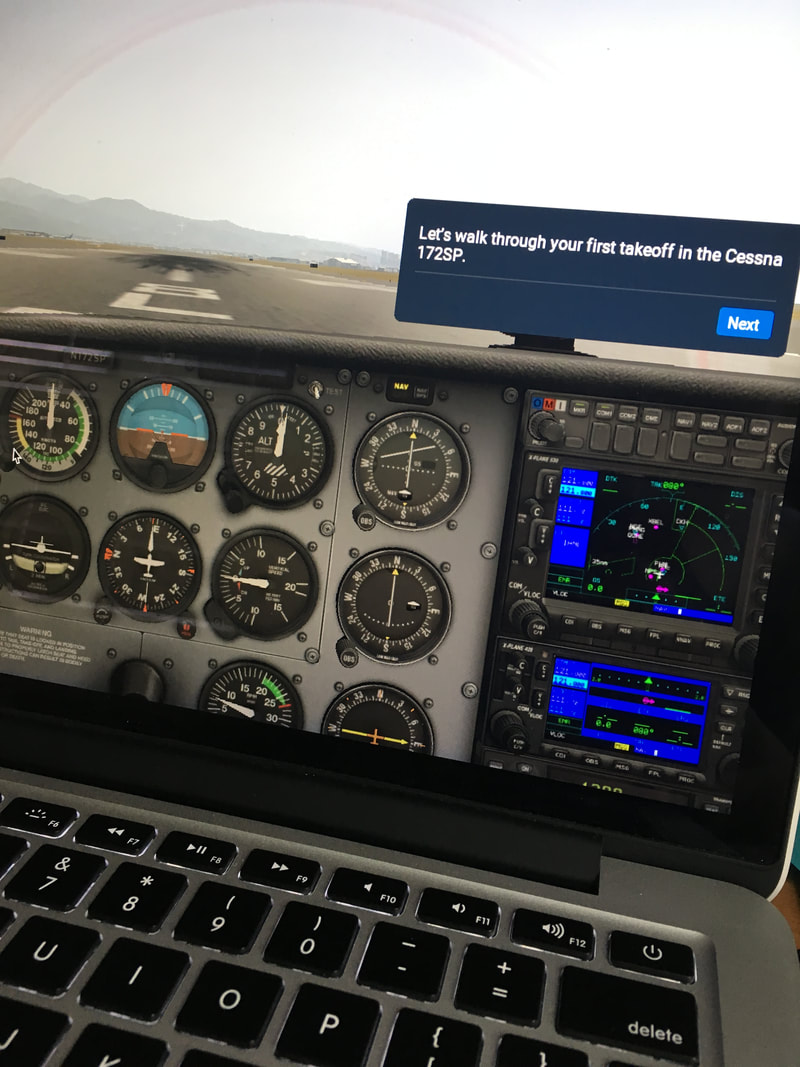 My first day of the intensive was a little bit of a surprise to me. I came in with a preconceived notion that our first day of school would be a syllabus day, where we meet with our rotational classes and determine what supplies are needed for the school year; however, upon arrival that day, I was updated that most of the day would consist of work time for our intensives, and had to make a plan for the day on the fly (no pun intended). My first thought was to investigate the flight simulator program I intend to use, but soon came to the epiphany that it was on my work desk in my bedroom after searching my backpack. With no success in the latter plan, I needed to find tasks to keep myself busy, so my day would not be wasted. I then proceeded to make my blog presentable with information on my intentions of the intensive, and a brief description of my history with aviation in the Who We Are section of the website. Currently, I have very minimal experience behind a yoke; I have about three hours logged, an hour of which is solely taxi time. I then figured, reminding myself of different taxi procedures and sign meanings would be a valuable asset in the near future. 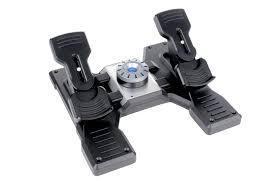 Pictured above are rudder pedals for a flight simulator (the same Saitek rudder pedals I use on my simulator). A weird, whacky thing about taxiing an aircraft is you use your feet to turn left and right, opposite to that of a car where you use the wheel. No matter how hard you thrust the yoke left or right, the plane will maintain its forward position, unless you push the right or left pedal to turn the nose gear in the desired direction. Another use for the rudder pedals (other than rudder controls and turning on the ground) is braking. Aircraft do use wind resistance to aid in the deceleration, but if you apply pressure to the tops of both pedals, the wheel brakes will evenly slow the aircraft. Although, if you were only to apply one of the brakes, only the wheel/wheels on that side of the aircraft will engage. This allows the aircraft to make sharp, close turns when taxiing (like a U-turn at the end of a runway).
|
AuthorMy name is Rory Hopkins, and I have been fascinated by the world of aviation since I was a child. Now I plan to pursue a career in the aviation world. ArchivesCategories |
 RSS Feed
